VMware ESXi Installation
This guide describes how the Allegro Network Multimeter Virtual Edition can be set up with VMware ESXi.
The Allegro Virtual Edition is designed for 2 use cases.
- It can analyze PCAP captures or packet ring buffers of unlimited size for forensic investigation and/or
- it can analyze live traffic from virtual machines by a virtual Mirror Port or ERSPAN.
DISCLAIMER
Section titled “DISCLAIMER”Packet analysis is resource intensive. Running the Allegro Packets VM on your own hardware and its performance outcome is warranted “as is”. Our support will be limited.
Be aware that an activated ring buffer can (heavily) degrade the I/O performance for all VMs. It is strongly recommended to use one or more dedicated HDDs or SSDs for the ring buffer to prevent side effects on other VMs.
System requirements
Section titled “System requirements”This guide requires a licensed VMware ESXi 6.7.0 or newer.
The system requirement of the virtual machine is:
- x86 64-Bit Intel/AMD CPU with SSE4.2 support (since 2011)
- 4 CPU-Cores
- at least 2GB RAM for the In-Memory-DB, the larger the better
- 20GB free disk space
Virtual Machine image
Section titled “Virtual Machine image”Please contact Allegro Packets or your reseller to download the current Allegro Virtual Edition installation Zip archive.
Installation
Section titled “Installation”Zip file extraction
Section titled “Zip file extraction”Please extract the Zip archive. It should contain the 3 files allegro-multimeter.ovf, allegro-multimeter.vmdk and allegro-multimeter-virtualbox.ovf.
OVF deployment to VMware ESXi
Section titled “OVF deployment to VMware ESXi”Log in to VMware ESXi.
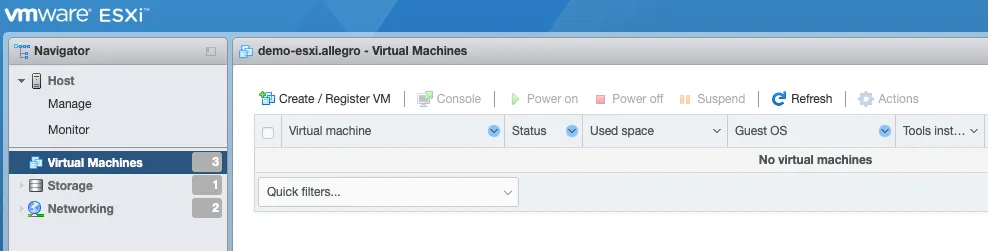
Once you have logged in, navigate to Virtual Machines
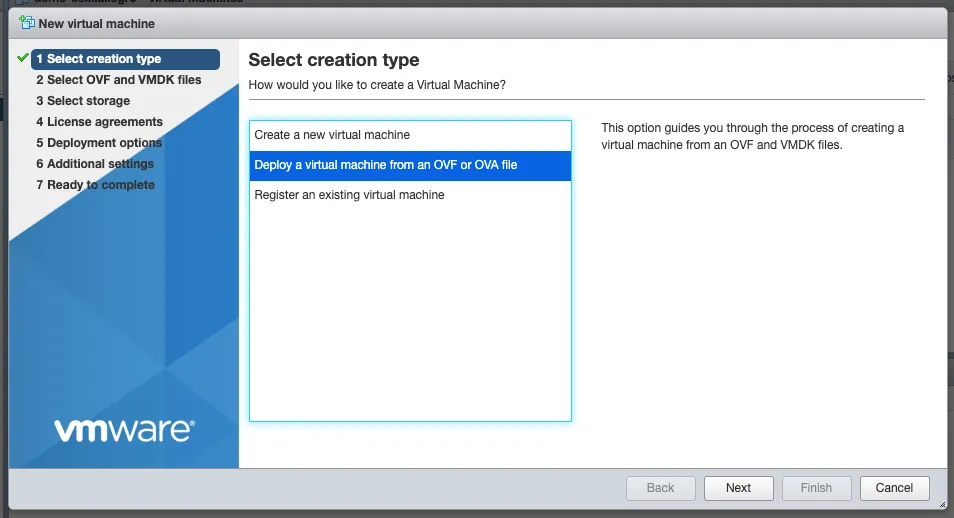
Create a new VM with Create / Register VM and select the option Deploy a virtual machine from an OVF or OVA file.
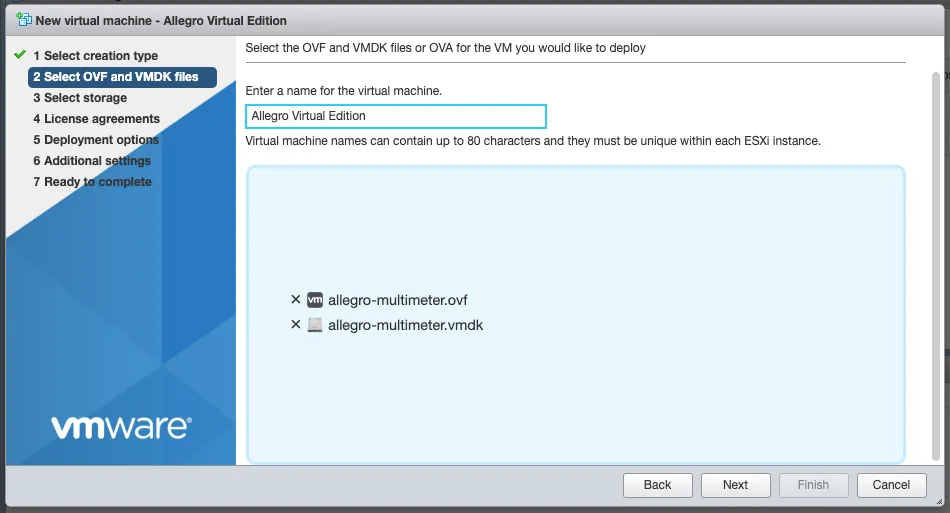
Press Next, use a preferred name for the Allegro and drag/drop the ovf and vmdk files into the window (as seen in the picture below) and press Next.
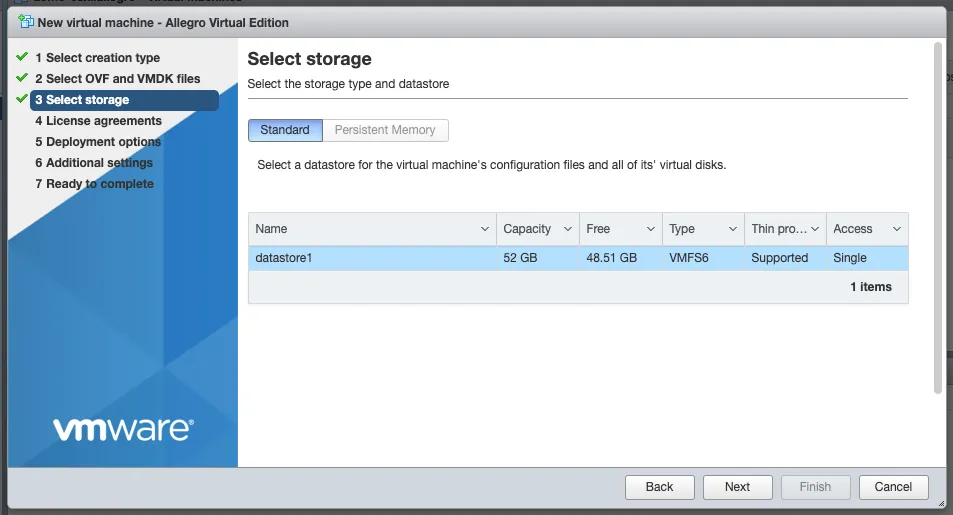
Select your data storage (20 GB is enough) for the Allegro. This storage will be used as the boot partition and to store the configuration of the Allegro Virtual Edition.
This partition/disk will not facilitate the packet ring buffer functionality. This does not require a high-speed disk.
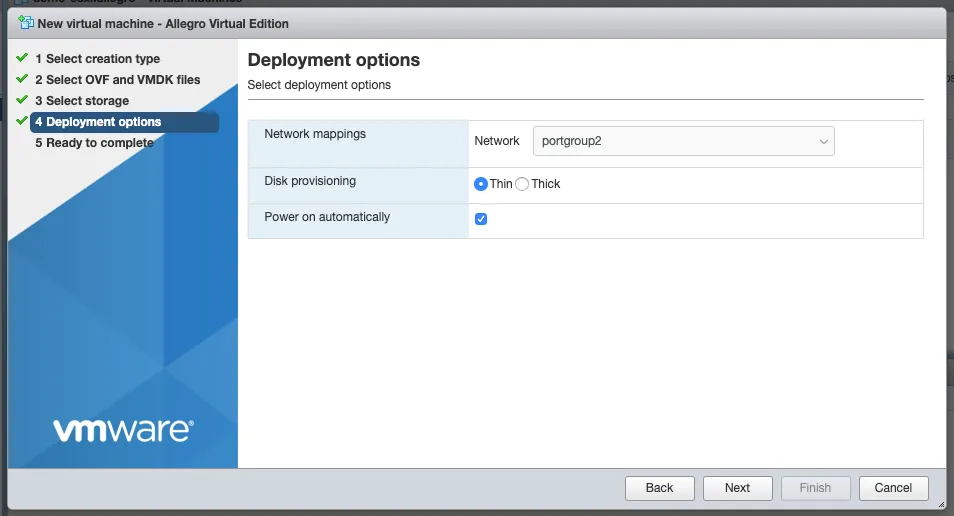
The deployment options allow you to select the network mapping for the management port and the disk provisioning.
Please double-check all options in the next dialogue and press Finish if everything is fine.
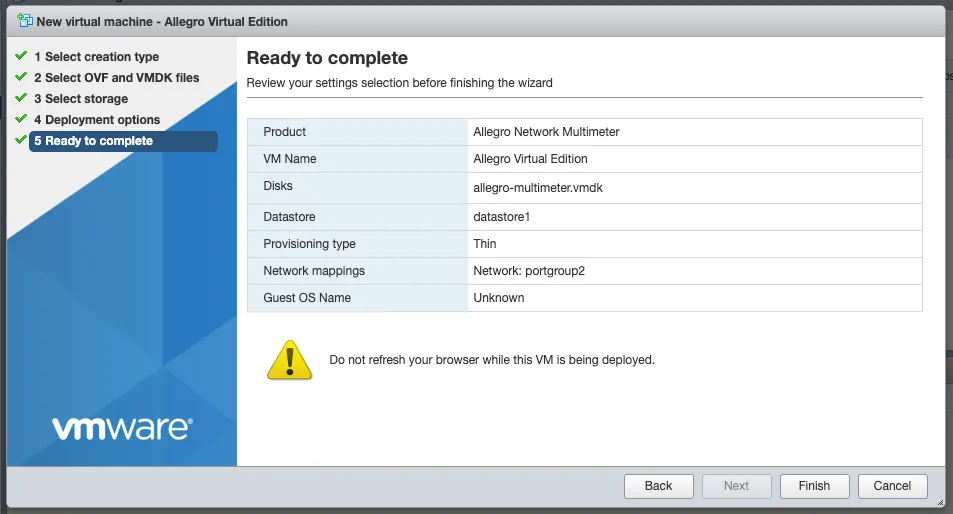
The upload and import of the Allegro Virtual Edition will start. Please be patient until it is finished.

Packet ring buffer and PCAP storage
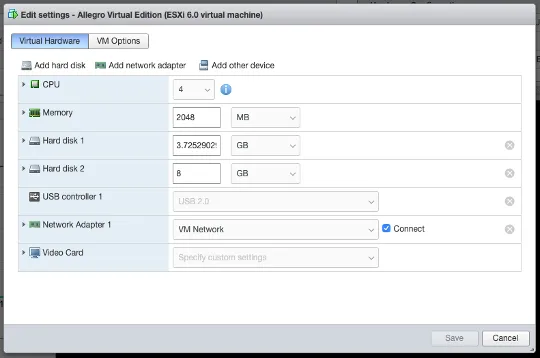
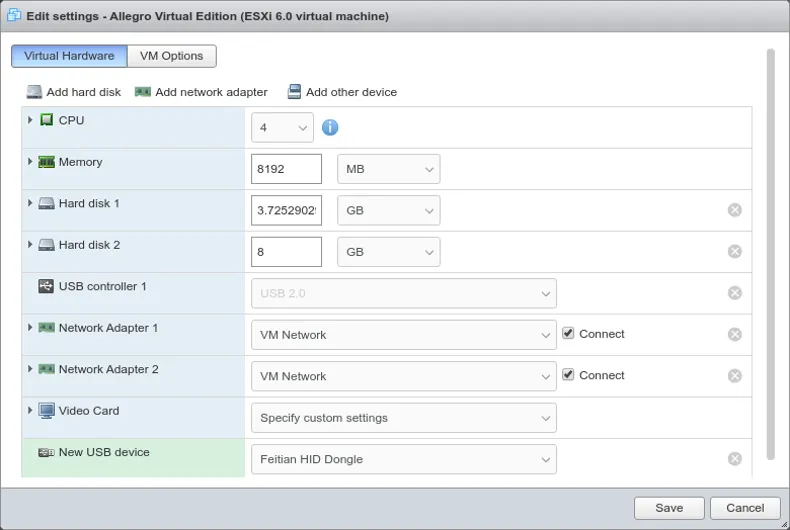
Section titled “Packet ring buffer and PCAP storage”For the ring buffer to work, you must add a Hard disk 2 virtual disk (or more) to the Allegro Virtual Edition. To do so, with a turned off VM, press Edit in the VMware ESXi host and add a new (high speed) HDD.
When done, power on the Allegro VM and go to menu Generic → Storage, to check if the Allegro Network Multimeter has detected a storage device.
Here an example of 1 attached/configured disk:
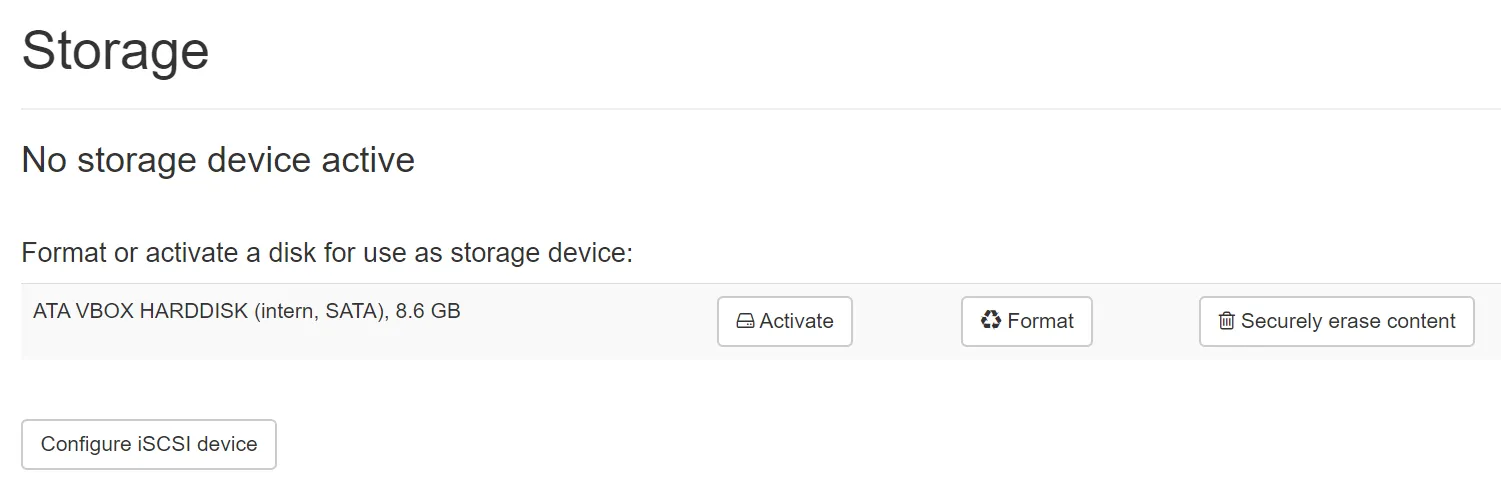
Here, on the Generic → Storage page, you can prepare the disks to be used by the Allegro by clicking the Format button. This will erase all content on the disk and create the filesystem for the Allegro. You can also activate and deactivate the storage device for PCAP files here.
For more information on the ring buffer, please review the corresponding page in the Ring Buffer Configuration Guide.
Disclaimer: Be aware that an activated ring buffer can (heavily) degrade the I/O performance for all VMs. It is strongly recommended to use one or more dedicated HDDs or SSDs for the ring buffer, to prevent side effects on other VMs.
Install USB License dongle
Section titled “Install USB License dongle”If the Allegro Virtual Edition is shipped with a USB License dongle, plug the dongle into an unused USB port of the VM host. The dongle must be connected to the virtual machine. When powered off, press Edit in the VMware ESXi host and click on Add other device. Choose USB device. A new entry on the bottom of the hardware list appears. Please select a Feitian HID Dongle or similar.
Initial startup
Section titled “Initial startup”Powering on
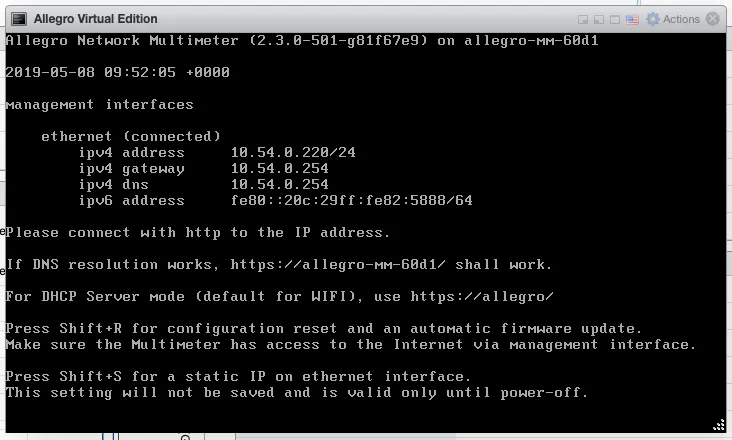
Section titled “Powering on”Power on the virtual machine when the import has been successful. The Allegro Virtual Edition will boot, prepare the installation and reboot once. The VM will seek for an IP address via DHCP on the management port. Check the screen output for an assigned IP address.
You can now connect to the IP address with your browser, in our case https://10.54.0.220/. The browser will show a certificate warning. Accept it to access the login screen.
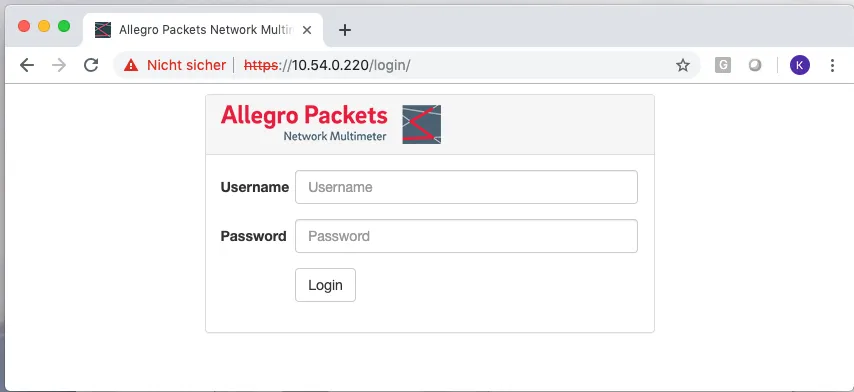
Please use the user name admin and password allegro for login.
License
Section titled “License”If the Allegro Virtual Edition was shipped with a USB License dongle and it has been correctly installed, the License is validated and the Allegro should activate.
The serial number of the Allegro Virtual Edition would be e.g. “dongle: 1234567890” and is displayed in the serial number box under Settings → License upload. If it is not displayed, even though the dongle has been correctly installed, please contact Allegro Packets support.
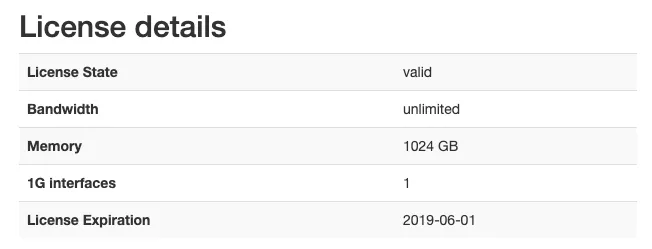
If the Allegro Virtual Edition was shipped without a USB License dongle, please follow the following steps. In the web interface a warning is shown that the Allegro Virtual Edition does not yet have a License.

Navigate to Settings → License upload and send the system serial number to testlicense@allegro-packets.com. Allegro Packets will issue a test License for you that can be installed by the Upload new License button. Once the test License is applied, it will show you the License details similar to this output:
The Allegro Virtual Edition is now running and analyzes all packets on the capture port.
Mirroring virtual interface
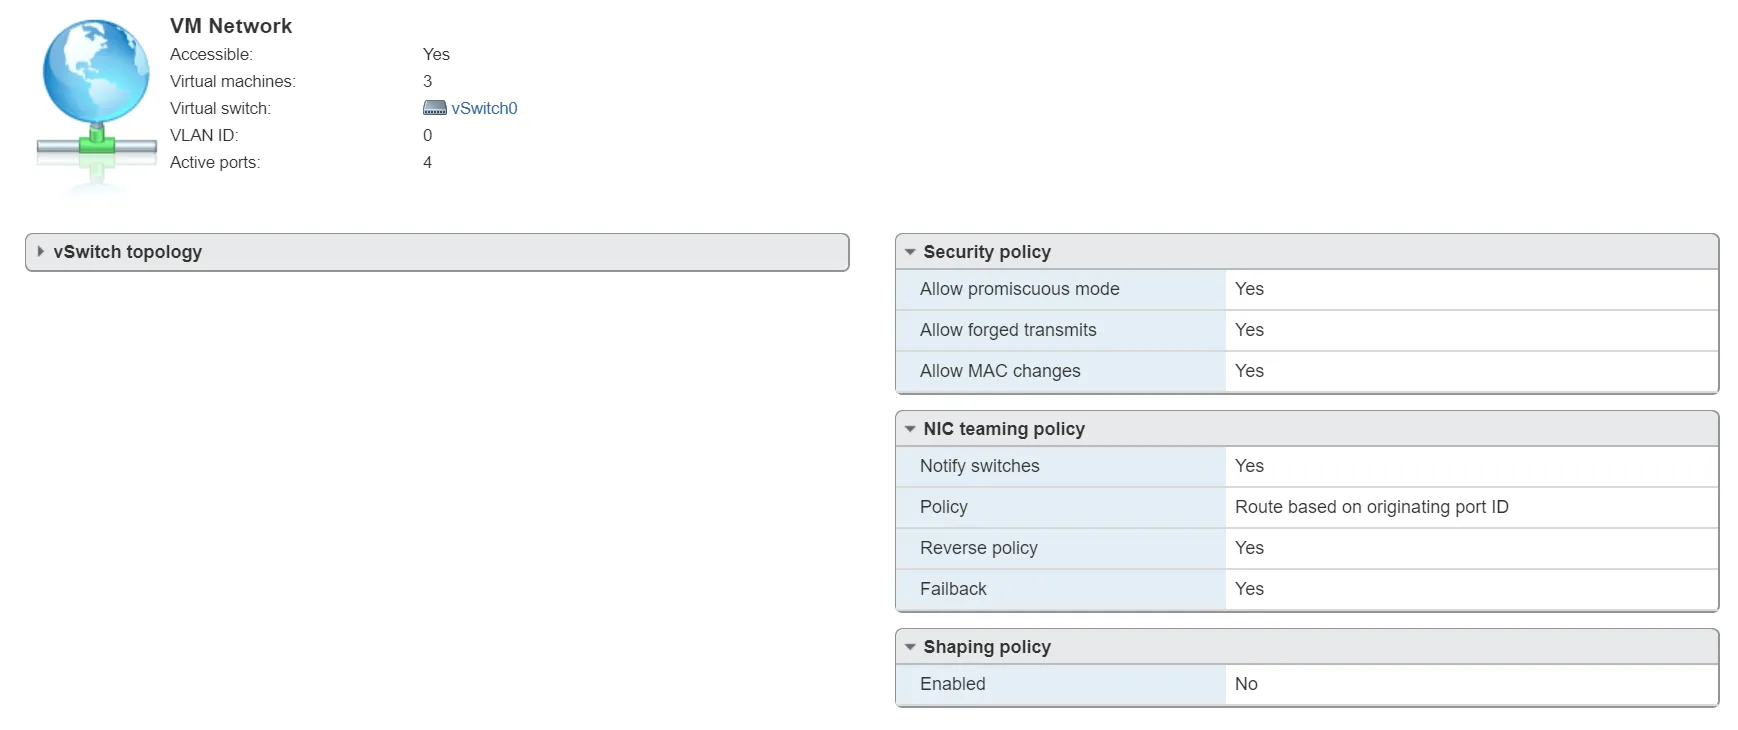
Section titled “Mirroring virtual interface”The Allegro Virtual Edition has by default 2 network interfaces. The first port is used for Management, the second is used as capture port. The Allegro Virtual Edition will analyze all traffic received by this network port.
Please enable the promiscuous mode for the vSwitch to allow the Allegro Virtual Edition to monitor all packets from a VMware vSwitch.
Encapsulated remote mirroring (L3) source
Section titled “Encapsulated remote mirroring (L3) source”The Allegro Virtual Edition supports the VMware Encapsulated remote mirroring (L3) source with the ERSPAN Mode. You can set up an IP address on the capture port and send encapsulated packets to the Allegro. Please see the VMware vSphere documentation center for Encapsulated remote mirroring (L3) source.